The Corpus feature lets you group together a set of Stylo articles. It serves two main purposes:
- to add a further level of organization to articles (in addition to tags). As in the case of editing a journal issue, it becomes possible to attach all the articles in that issue to a single corpus, thus providing a new hierarchical level of document organization;
- to group together articles that you would like to export together, for instance to create a Crieur website with certain “issues”.
Corpora are implemented in both personal and shared workspaces. So a corpus is not necessarily created for a single user, but can also be shared with a group.
The corpus management page now gives access to articles through hyperlinks. However, this page is dedicated to the creation, the modification or the manipulation of corpus data.
Create a corpus #
To create a corpus, first go to the corpus management page by clicking on the [Corpus] button in the black banner at the top of the interface.

Next, the [Create a corpus] button displays a form in a pop-up window. This form contains three fields: title, type and description. The first two (title and type) are mandatory, and the third (description) is optional. By default, the type is set to “neutral”.
Once created, the corpus appears in the corpus manager, offering four new functions:
- Edit the corpus;
- Delete the corpus;
- Export the corpus;
- Preview the corpus.
Adding articles to a corpus #
To add articles to a corpus, simply click on “choose articles”, which will display a pop-up window with those in the workspace you are in, which you can add or remove (don’t forget to click on “choose these articles” to confirm these choices).
Ordering a corpus #
When several Stylo articles are grouped together in the same corpus, it is possible to order them. Unfold the corpus information window and arrange the articles using drag-and-drop (hold down the left click and move the cursor to position the article in the right place, then release).
Edit a corpus #
Corpus information (title and description) can be updated by clicking on “modify” through the three dots icon: 
A pop-up window containing a form will open, allowing you to modify these two fields. However, it will not be possible to change the corpus type once created, to avoid metadata conflicts between types - you will need to create a new corpus with the correct type and delete the old one.
To modify your corpus’s metadata, click on “Edit metadata” in the three-dot menu. You will see a predefined metadata form for your corpus type, which you can enrich and supplement with other metadata that might be useful to you by editing the raw YAML metadata: 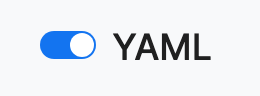 .
.
Copy a corpus identifier #
It can be useful to copy a corpus’ identifier, for use with other tools such as Le Pressoir and Le Crieur, that can take Stylo corpus as input to generate static websites out of them.
You can copy the identifier to the clipboard by clicking on the functionality on the three dots icon.
Exporting a corpus #
Exporting a corpus is carried out in the same way as exporting an article.
To export a corpus, go to the corpus management page and click on the export button.
Note: Unlike articles, there is no access to the export function from the document editing interface, since the corpus exports several articles at the same time.
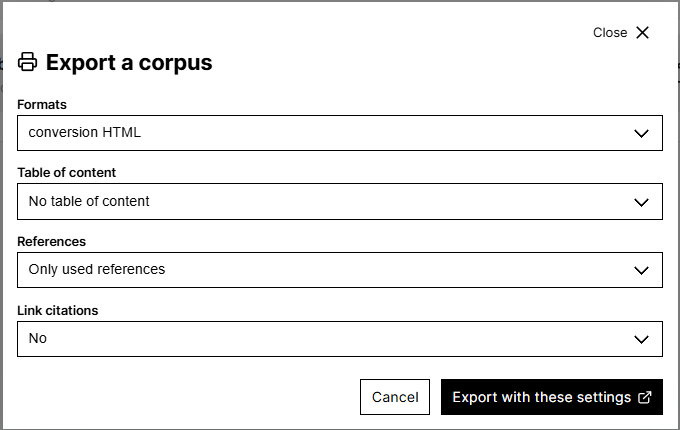
A window opens with several export options:
- the format to be produced:
- HTML5 ;
- ZIP ;
- PDF ;
- LATEX ;
- XML (ÉRUDIT) ;
- ODT ;
- DOCX ;
- EPUB ;
- XML TEI ;
- ICML.
- additional options:
- presence or absence of a table of contents;
- numbering or absence of chapters and sections;
- type of content division.
