How it works #
Workspaces meet the need to share Stylo articles between several users. This implementation allows us to distinguish several spaces within Stylo. First, there’s the most commonly used space, the personal space: this is where every user arrives by default.
The personal space is where everyone can create and manipulate articles in Stylo. It’s perfectly possible to remain in this space and share articles manually with other users via the share functionality.
However, if a document is to be shared with several users, it may be worth using the workspace feature.
Workspaces are not entities to which a user can assign ownership of an article. All articles remain associated with the user who created them. The workspace, on the other hand, simply serves as a gateway for sharing a set of articles with several other users. It should be seen as a specific channel for sharing content.
For example, you can create a workspace for a magazine and share the various articles currently being edited. The workspace itself may be named “XX Magazine”, but the articles associated with it will not belong to this workspace. Each article will remain attached to the user account that created it.
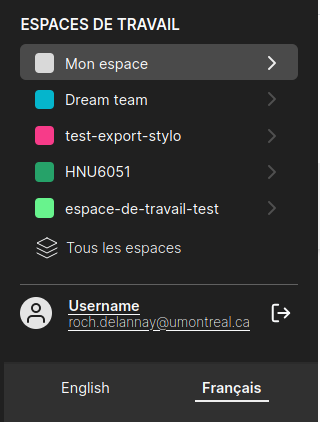
You can access this feature via the drop-down menu accessible by clicking on the non-user at the top of the page.

Then click on [All spaces] to access the workspace management menu.
Manage your workspaces #
The workspace management menu has three functionalities:
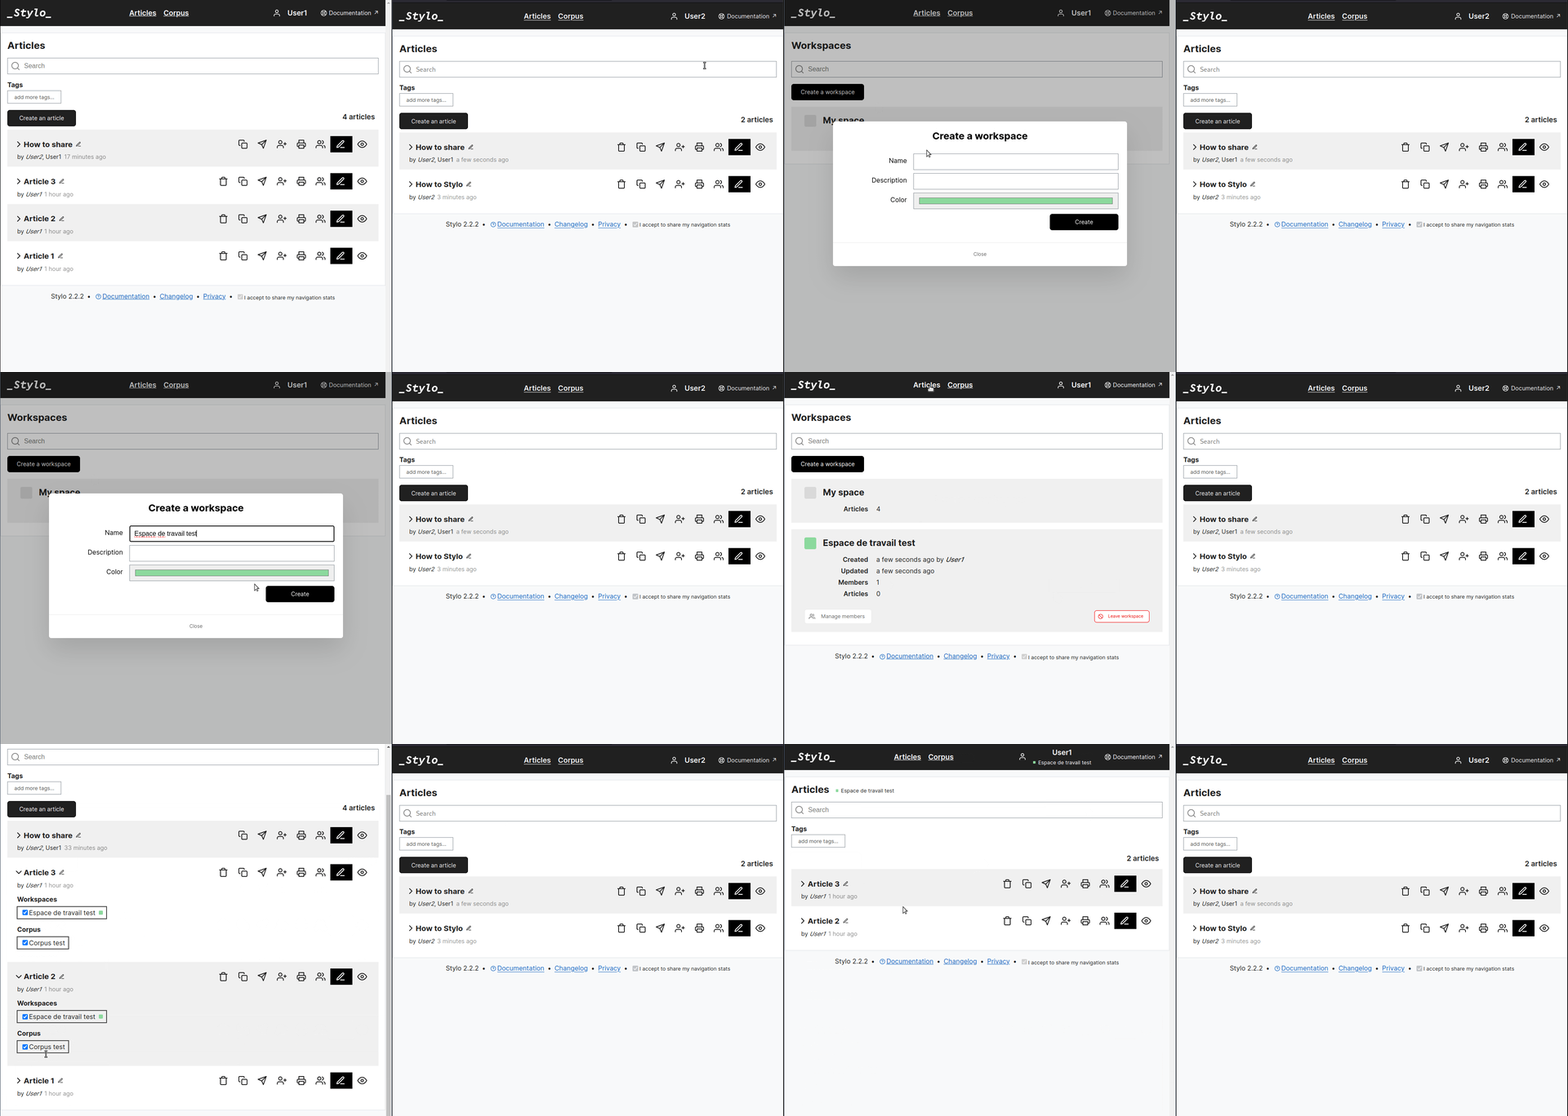
- create a workspace by clicking on the corresponding button [Create workspace]. This opens a form with three fields: Name, Description and Color.
- the ability to exit a workspace. To do this, click on the [Leave workspace] button.
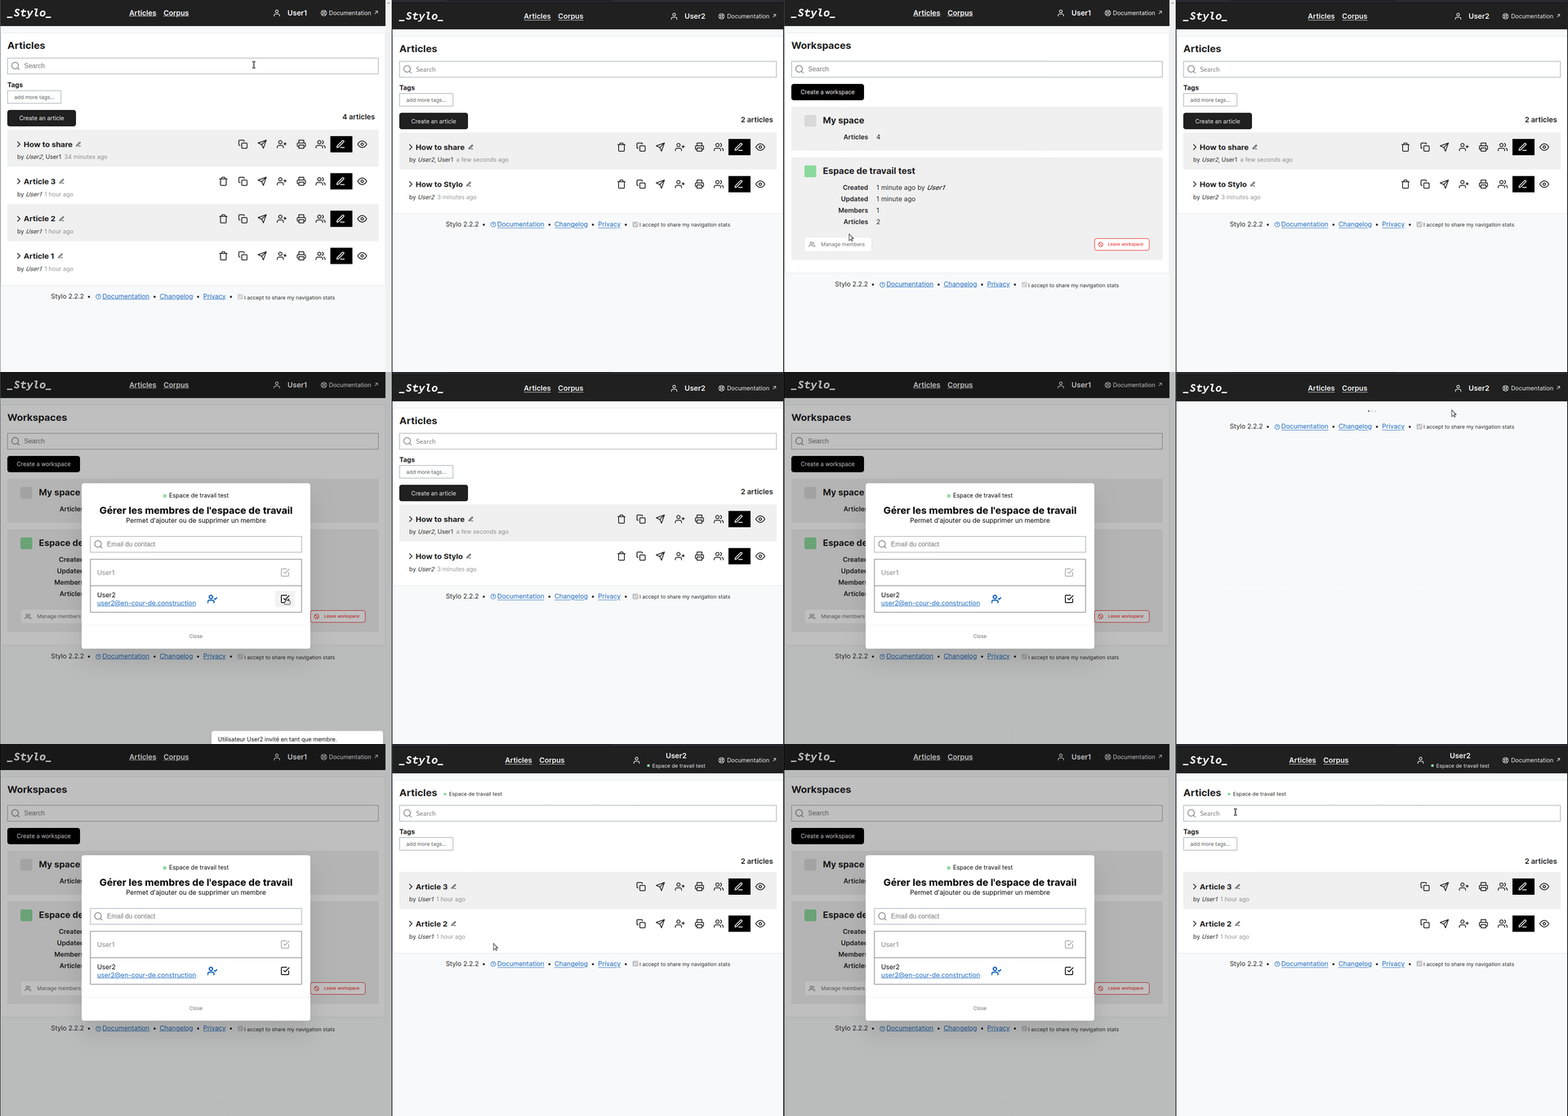
- manage workspace members using the [Manage Members] form, visible in the information area of each workspace you’ve created.


Display a workspace #
A workspace is a configuration that allows only related documents to be displayed in the Stylo interface. They are displayed instead of personal articles.
Articles are not displayed in the workspace management menu, but on the [Articles] page (available at the top of the page).
Then click on your [User name] and select the workspace you wish to work in from the drop-down menu.
The user’s workspace is indicated in two different places:
- in the menu at the top of the page, under the [User name];

If nothing is indicated under the Username, you are in your personal workspace;

- the workspace name is also shown at the top of the article list.

Articles shared in the workspace appear in place of personal articles. They can be accessed with the same functionality as in a personal workspace.
The corpus feature is also available in workspaces. A distinction is made between personal corpus and corpus linked to workspaces.
Associating an article with a workspace #
The [Articles] page changes slightly between the personal space and workspaces. The [Create article] button is no longer present in the workspace.
As mentioned above, the workspace is not the owner of the articles shared within it. Consequently, to associate an article with a workspace, you need to return to your personal workspace by clicking on its [User name] in the black banner at the top of the page, then on [My workspace] to display your articles.
You can only create an article (or add it to your workspace) from this interface.
Once an article has been created, open its information by clicking on the arrow  and tick the box associated with the workspace in which you wish to share the article.
Deleting a workspace #
There is no button for deleting a workspace. This task is performed automatically when the last member of a workspace clicks on the [Leave workspace] button in the workspace management menu.
If the last member of a workspace wishes to leave it, a pop-up window appears, asking for confirmation of this action.
Only the sharing session between members is deleted once the last member has left the workspace. As articles remain associated with their creator, they remain available on the owner’s personal space.